
Over the years, many a hiker and backpacker has been left scratching their head while attempting to navigate in the outdoors. After taking careful compass and map readings and traveling on their bearing, somewhere down the line they find themselves far from where they hoped they’d be.
Where did they go wrong?
While there are a few factors that might cause such mishaps and misjudgments, the most common by far is forgetting to adjust for magnetic compass declination on your hiking compass. Below, we offer a simple guide to help you better understand magnetic declination (a.k.a “magnetic variation”) and make the adjustments that will keep your wanders on course when navigating with a magnetic compass.
Table of Contents
What Is Magnetic Declination?
Magnetic declination refers to the disparity in the angle between true north vs magnetic north.
At this point, you could be forgiven for asking “magnetic north vs true north…wait, are there two north poles?!”
Well, yes and no.
A magnetic north reading is the “north” given by your magnetized compass needle (and points in the direction of north in the Earth’s magnetic field) and true north (or “geographic” north) is the direction of the geographic North Pole.
In layman’s terms, then, there are two norths. One lies at a latitude of 90° north in the northern hemisphere, not far from the coast of Greenland, and the other, the magnetic pole, lies – at present – just under 12° south of the geographic pole in the Northwest Territories of Canada. A third north exists in the form of Grid North, but that’s a topic we’ll save for later.
“At present”?
Yep! Without going into uber-geology geek mode, the churning of liquid iron in the earth’s core causes the earth’s magnetic field to be in constant flux. As the iron core slowly churns, the observed magnetic field above the earth’s surface changes. As such, magnetic north is constantly changing and we need to compensate for it in compass readings.
The angle of magnetic declination, therefore, is not fixed and varies depending on both your location and over time – in keeping with magnetic changes in the Earth’s core. For example, the declination deviation between locations on the east coast of the US and the west coast is nearly 40°.
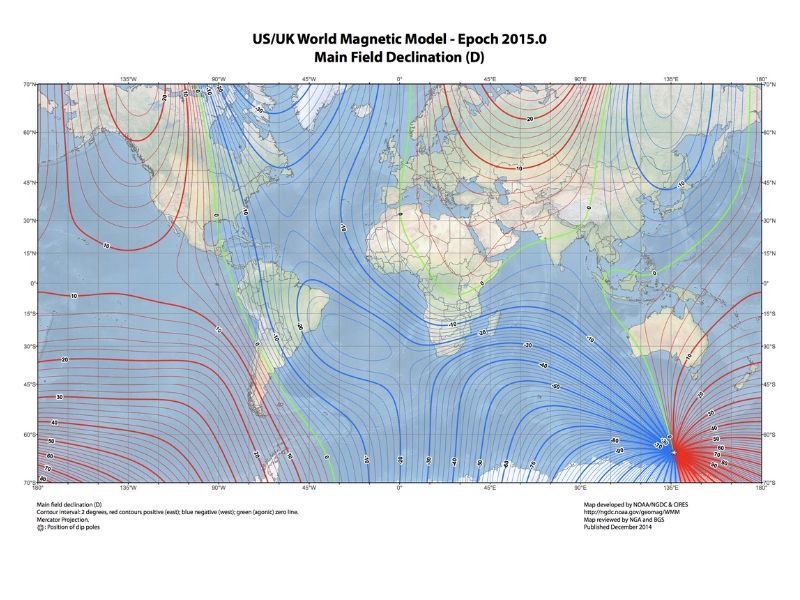
The Ever-Changing Magnetic Field Of The Earth
This great declination map video from NOAA shows the change in the position of the magnetic north pole as it dances around the northern Canadian Islands from 1590 to the present day.
The green line bisecting North America is the 0-degree line of magnetic declination, i.e. at any location on this line, there is no difference in bearing between magnetic and true north.
The red lines are positive declinations (where your compass needle would be pointing at magnetic north, east of true north). The blue lines are negative declination lines, stipulating that the location of the magnetic north pole lies on a bearing west of true north.
How To Find Magnetic Declination For Your Area
There are three ways to find out the magnetic declination of your location.
- Your topographic map. Typically, (good) maps will have the bearing (positive or negative) that you should use to adjust for magnetic declination. This is sometimes in the form of a small compass or written as text by map makers. It’s often located near the scale and legend.
- A second source would be to do a quick google search for any magnetic declination calculator, alternatively follow this link to take you to the NOAA calculator.
- Lastly, if you allow your browser to access your current location, going to magnetic-declination.com will bring you details on your current position on a magnetic declination map.
How To Adjust Your Compass Readings For Magnetic Variation
1. Check Magnetic Variation For Your Area
Because declination values vary from place to place, before setting off on your trip, you should find out the degree of magnetic variation for wherever you plan to do your hiking. Without it, you’ll be unable to get a true bearing or accurate compass reading.
2. Learn How To Adjust For Magnetic Declination
How to Set Declination and Make Compass Declination Adjustments
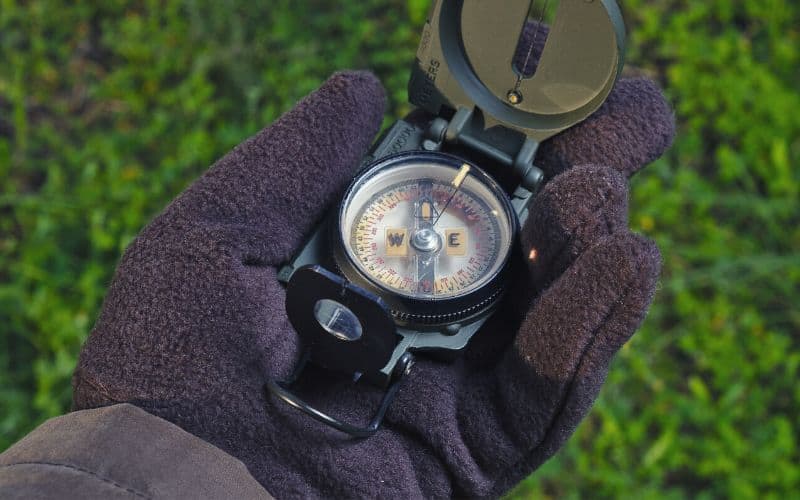
Many compasses come with an adjustment key that allows you to make the necessary modifications for magnetic declination with the minimum of fuss. In most cases, the key is attached to the compass lanyard.
Setting a compass for magnetic variation is pretty straightforward. Here’s how it’s done:
- Turn your compass over so the housing faces down
- Insert the adjustment key into the screw in the back of the compass
- Make the relevant declination adjustment for your specific location by turning the key until the indicator is the required number of degrees on either side of zero
- You can now take accurate compass bearings without having to worry about the magnetic field of the Earth sending you off in the wrong direction.

How to Use a Non-Adjustable Compass
Using a compass without adjustable declination is slightly trickier but shouldn’t pose too many problems for those happy to do a little mental arithmetic while on the move and then transfer readings from their compass to the terrain and vice-versa.
- Again, find the declination variation for the area you’re hiking in
- Make the necessary adjustments for declination by adding or subtracting the declination value for your area
Bear in mind when making adjustments that:
- It is essential to do so each time you take a reading and work with a bearing
- An east declination will be a positive number, and a west declination will be a negative number
3. Remember To Adjust In The Right Direction
The following are two crucial points to remember when using readings taken from either your map or the terrain:
- When taking a reading from the terrain and transferring it to your map, you must add the magnetic variation to get the correct bearing
- When transferring a bearing from your map to the terrain, you must subtract the magnetic variation to calculate the magnetic bearing you will then travel on

Magnetic Variation: Add or Subtract? Two Examples
Example 1: If you happen to be in Tucson, Arizona, which has a 9-degree East declination, then magnetic north is east of true north by 9°.
Therefore, you must add 9° to the heading (the direction your compass needle points towards) on your compass’s dial to determine your true heading, i.e., if your reading is 230°, you are pointed towards a heading of 239°, and to travel on a bearing of 230° will need to get a reading of 221° on your dial.
Example 2: If you happen to be in the vicinity of Mount Fuji, Japan, where the angle of declination is -7 degrees, then magnetic north and true north are 7 degrees apart, with magnetic north sitting 7 degrees to the west of true north.
To adjust for this you must subtract 7 degrees to the heading to determine your true heading, i.e., if your reading is 200 degrees, you are pointed towards a heading of 193 degrees, and to travel on a bearing of 200 degrees will need to get a reading of 207 degrees on your dial.
Learning how to use a map and compass correctly is a must for anyone serious about spending time in the great outdoors. A vital part of this process is to learn how to correctly adjust for the magnetic declination at any given location. We hope the above guide has shown you how to do so and you’ll be able to put this new skill into practice with ease in the field.
Did you like this article? If so, let us know in the comments box below. And if you’d like to share it with your friends, please do!

